Smoking a joint is one of the most iconic ways to enjoy cannabis.
Given this, it’s no wonder that some weed aficionados consider a properly-rolled joint a piece of art; every cannabis smoker should learn how to make one.
There are countless opinions on the most effective ways to do it, but the whole philosophy behind rolling a perfect joint is to ensure that your wrapped cannabis burns smoothly and evenly.
As with everything in life, practice makes perfect. Fortunately, it doesn’t take much time to master your own craft, so we’ve put together a simple step-by-step guide to rolling a perfect joint everytime.
How to Roll a Perfect Joint in 5 Simple Steps
Rolling a perfect joint doesn’t call for expensive equipment. In fact, all you need is some basic cannabis supplies, a bit of patience, and some basic manual skills, so unless you’re all thumbs, you’re going to be all good.
Let’s get down to the business.
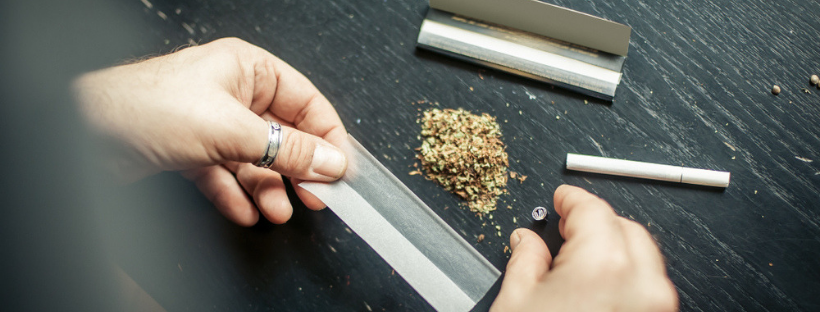
Step 1: The Prep Stage
Before you even think of rolling a joint, make sure you have everything you need to become a weed artist.
Here’s a quick checklist of what to gather ahead of packing the weed into papers:
- Your favorite cannabis strain
- Rolling papers
- Tips (or filters)
- A weed grinder
- A pen or pencil (to help yourself pack the joint)
As much as we’d like to elaborate on each of the above items, there’s one thing that can make or break your cannabis experience even if the rest has been properly taken care of — we’re talking about rolling papers.
Step 2: Choose Your Rolling Papers
It should go without saying that quality rolling papers are a must if you really aim at rolling a perfect joint.
Since those papers come in an array of sizes, shapes, and designs, picking the best type for your needs may prove challenging.
Then, there are also different colors and flavors, which eventually creates a thick fog of confusion among new cannabis users.
Worry not, as the choice is much simpler than you think. The best papers for rolling a perfect joint are made from hemp. Hemp papers burn slowly and evenly, not to mention that they’re also free of any synthetic additives. Plus, when you use hemp papers to create a joint, everything stays in the cannabis family.
Alternatively, you can choose wheat straw or thin rice papers in the standard or king size. The thinner and finer the rolling papers, the easier it is to roll a perfect joint.
Step 2: Grind the Cannabis
This is where the consistency of your weed comes into play.
It doesn’t take a genius to guess that if you fill a joint with large chunks of cannabis, you’ll have troubles smoking it, as the bud will burn too slowly, leaving much waste behind.
On the other hand, if the weed is too powdery, it will combust too fast, causing the joint to burn unevenly.
That being said, you need to grind the weed somewhere between the two states.
First, break down your weed into smaller pieces. If the cannabis has been properly cured and dried, it should have no problem breaking apart.
Once you’re done, put the weed into the grinder. This piece of equipment prevents your hands from getting sticky and keeps the precious resin inside the collecting chamber.
If you don’t have a grinder and don’t want to grind the herb down by hand, feel free to use scissors, a knife and a cutting board, or any other DIY method.
Step 3: Make a Crutch/Filter
A crutch, also known as tip or filter, can be made out of just about anything.
Do you have thin cardboard, a used up buss thicket, or a business card? Then you have everything to create a filter for your perfect joint. Besides, most rolling papers also include crutch material in the package.
While the crutch isn’t absolutely necessary, it helps to keep your ground weed from falling out of the end of the joint, or straight into your mouth along with smoke — if that happens, you can say that you’ve just been hit by a weed comet.
On top of that, the crutch adds some stability to the joint and allows you to enjoy your beautiful creation without spitting combusted flowers or burning your fingertips.
Step 4: Pack the Joint with Weed
Place the crutch at the beginning of your joint and fill the paper with the ground bud.
Follow through by forming and shaping the joint with your fingers. Depending on the shape of your crutch, the joint can be straight or look like a cone.
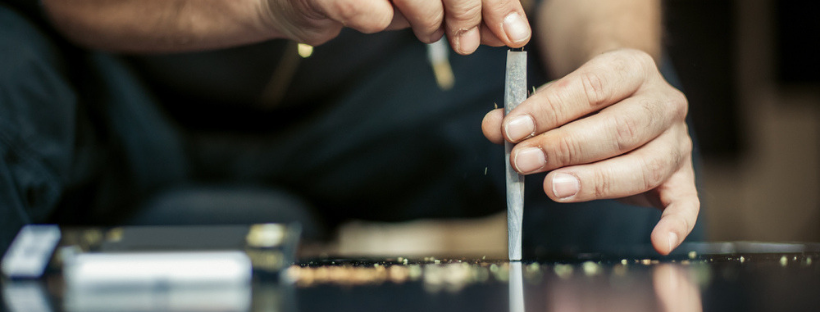
Step 5: Roll it!
This is where you can come out as a winner or end up with a miserable excuse of a joint.
Just for the record — you want to roll a perfect joint, so the latter is not an option.
Got it? Awesome, let’s do some handiwork:
- Tuck the unglued side of the paper into the cone-like shape.
- Lick the glued edge to add a bit of moisture and ensure the joint holds firmly.
- Tack down one end of the paper, starting with the crutch side. This will help you guide the wrap roll around itself.
- Work your way down to the rest of the cone but don’t seal the joint yet!
- Pack the end of the joint with the remaining weed to ensure it burns evenly. That’s where a pen or a small stick will come in handy.
- If you’re not planning on lighting up right away, close the end of the joint with a twist.
Pro tip: you can form the so-called “flat roof” on top of the joint by pulling the edges of the twisted tip all around it. Once you ignite the roof, it will fall off ensuring that the joint burns evenly from the very beginning.
A Final Hit On Rolling a Perfect Joint
There are numerous ways to roll a joint once you learn the basics behind this simple process. But before you draw out the big guns, start by mastering the classic technique we’ve just described above. Rolling a perfect joint is an art all on its own, but the most iconic pieces of art on this planet have always been simple — and that’s the conclusion we’d like to leave you with.
Are there any weed artists with us? What’s your go-to way to roll a perfect joint? Share your thoughts!
3 thoughts on “How to Roll a Perfect Joint”